

Off Topic: How I Easily Turned Obsidian + AI + MCP into a Real Second Brain*
*As AGI gets closer, my dream gets closer to a reality


In the last few days, I turned a few tools into what’s as close as I can get to a second brain.
But that’s not even the impressive part.
The truly impressive part is that millions of other people are doing the same, in minutes, and unlocking connections between the stuff we’ve been putting in the digital space for ages!
This. This is why AI is not just a fad. This is how AI can become useful to us, personally.
Besides having robots do all the housework and cook dinner for us, I’ve been excited by the thought that all the things I think about could become useful, long after I’ve gotten dementia or died.
“That’s all great, Nate, but what about today?”
Today, I can finally say the dream of assistance in connecting my personal thoughts with the outside world - trends, changes, new ideas - to create and build new realities and ideas… well, that’s a thing now.
NOTE: It’s still a bit clunky.
But, if you’ve read up on Model Context Protocol (MCP), here’s how to apply it to your own personal knowledge management system (PKM), like Obsidian.
(And if you haven’t read up on it, don’t worry, I’ll walk you through it here.)
Here’s the point: We’re finally at a stage where we can connect dots that might never been connected before in our own journal entries, evergreen notes, thoughts, and discussions.
Let’s get to it. Only 2 steps.
Setup the tools
How to use it
Setup the tools
You’ll already need to have Obsidian downloaded and a local vault of Markdown files.
You’ll need to know where your vault is - the path to it. Here’s an easy way todo that… get the “Show Current File Path” community plugin. Install and enable it.

Open up a file and then the command palette. Type in “copy path” and select “Show Current File Path: Copy path”. Paste that somewhere that you can use later like a text file. It’ll look something like this:
/Users/nateritter/Library/Mobile Documents/iCloud~md~obsidian/Documents/Nate Ritter/
Just make sure to add the slash at the end, and remove any sub-directories that might have crept in there based on the file you chose to do this with.
NOTE: I know it’s not recommended you use iCloud for your vault location, like I do, so just beware of that. Why it’s a bad idea is outside the scope of this write up, but I know. Don’t flame me in the comments.You’ll need node and npx installed. There are a myriad of ways to do this, and I don’t want to be a participant in messing up your system, so be careful here and ask a trusted friend if these sound too technical for you. My surface-level recommendation is to test your system first to see if you have node, and if not, install it via homebrew.
Open a terminal window and type
node --version && npm --versionHopefully you see something like this as the response:
v23.9.011.2.0This means I’ve installed v23.9.0 of node and version 11.2.0 of npm. If you get a response other than a couple of version numbers, you likely need to install one or both of these. My opinion is that it’s easiest to install these on a mac using homebrew like this, again, in your terminal:
/bin/bash -c "$(curl -fsSL https://raw.githubusercontent.com/Homebrew/install/HEAD/install.sh)"When homebrew is installed, install node and npm like this:
brew install nodeIn some cases you’ll want npx as well, so, test that first with:
npx --versionwhich should respond with a version too. If it doesn’t just install it globally with this command:npm i -g npxDone with half the geekery.
Now, you’ll also need to download Claude Desktop. There’s the link for you right there. Download it. Install it. Open it.
Next, we’re going to find the config file for the MCP servers that can be added to Claude. Per Anthropic’s instructions here, open the Settings, then click on Developer, then click on “Edit Config”

Here comes the 2nd half of the geekery. With the config file open in your favorite text editor, add a bit of code to the config file (this comes straight from the maker of the MCP themselves). Here’s the format:
{
    "mcpServers": {
        "obsidian": {
            "command": "npx",
            "args": ["-y", "obsidian-mcp", "/path/to/your/vault", "/path/to/your/vault2"]
        }
    }
}
So, here’s what I added inside themcpServersobject: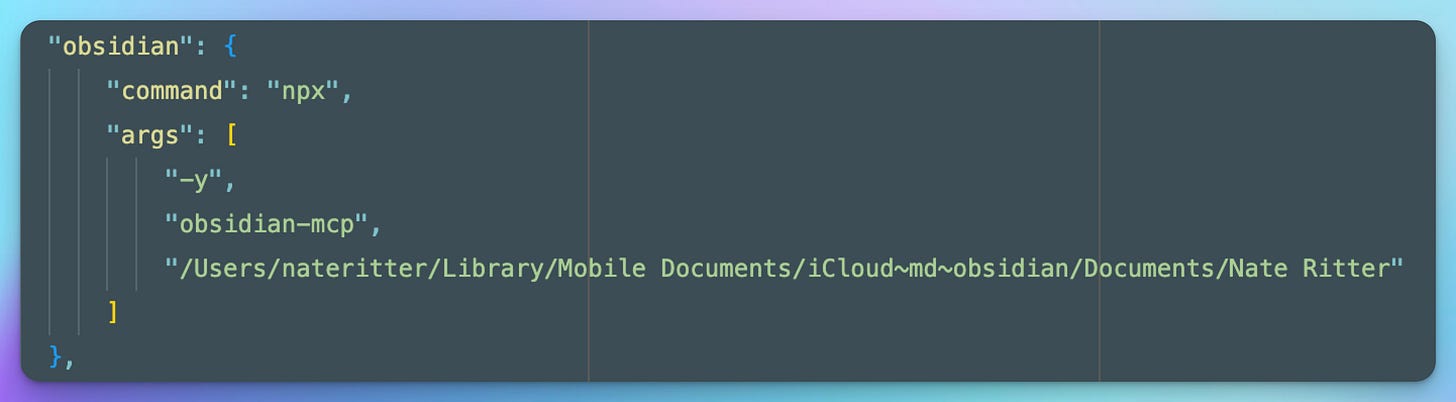
NOTE: I have other MCP servers listed, so if you don’t, you can remove the comma at the end of my example, as shown by the example above this screenshot.
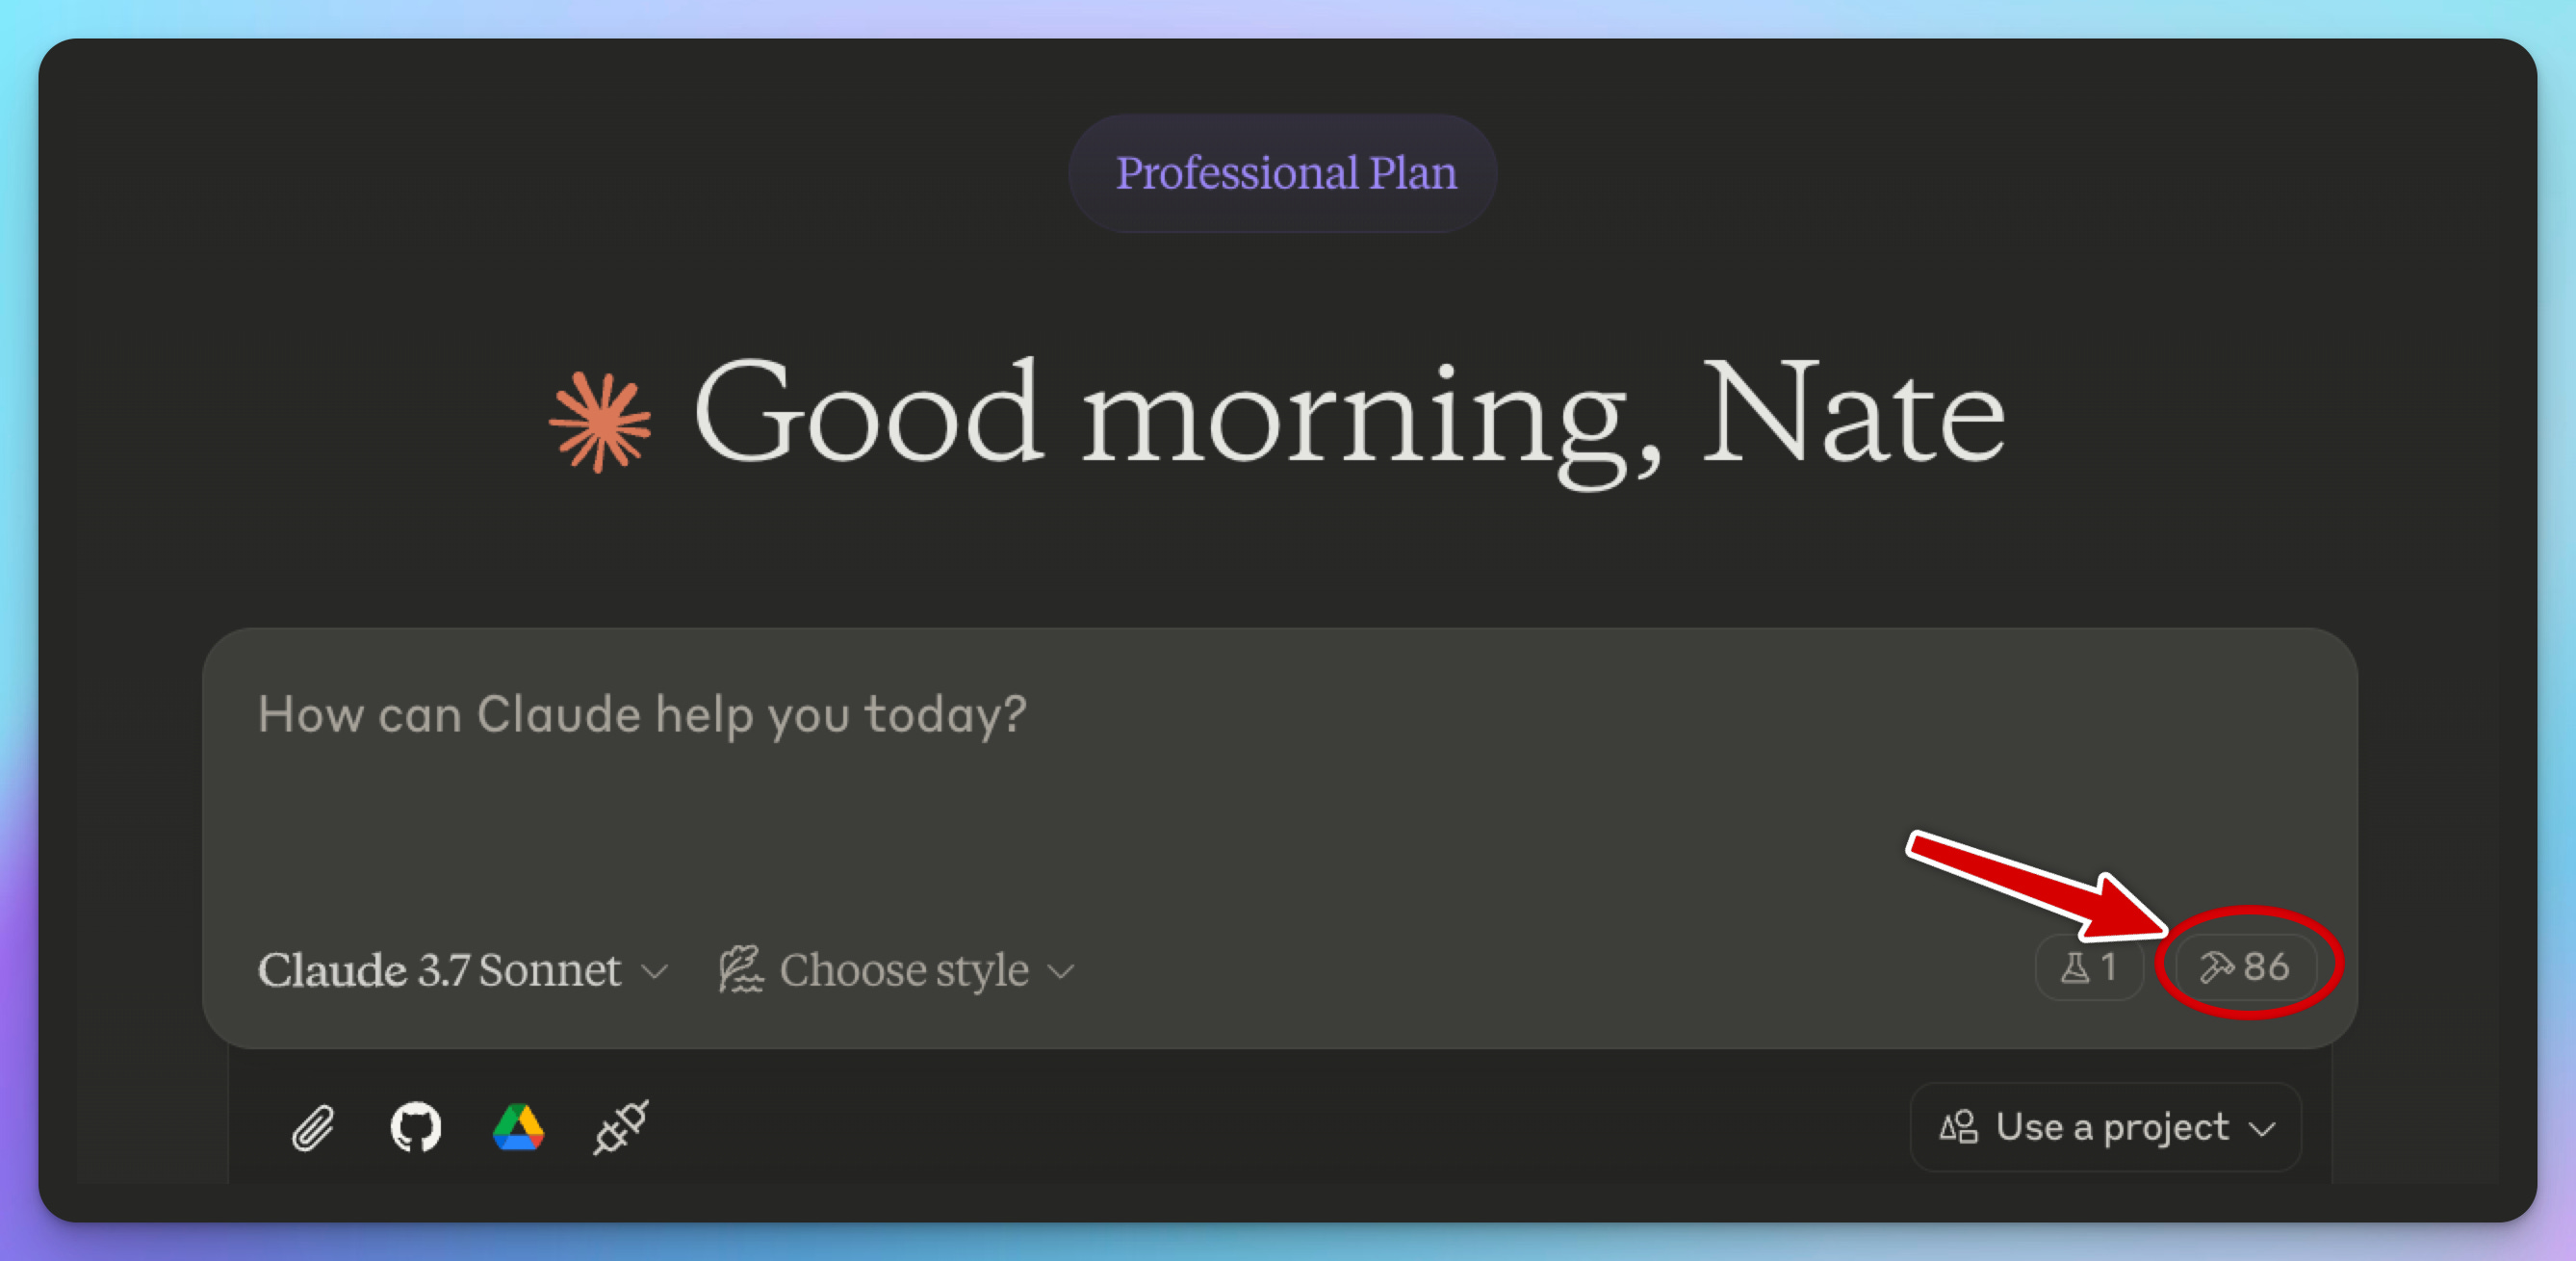
Quit Claude Desktop and re-open it. You should now see a number next to a little tool icon (I have a lot, you won’t see this many):

Clicking it will show you all the MCP tools you have available, including the “obsidian” tool and what it can do.


Great… that was annoying easy to setup, right?
So, how about we move on to actually using it, shall we?
How to use it
This part is easy.
If you want to only ask questions about your own Obsidian vault, simply type this in the prompt like so:use_mcp_tool obsidian
Or, if you would rather be less of a nerd, just ask it nicely like this:
Use the mcp tool obsidian.
Follow this with whatever prompt you want, like so:

If you’re a founder who wants to get the most from AI to reduce churn, understand your ideal customer, generate more leads, and more… I’m here for you. Get in touch.